This tote measures 17 x 15 x 6 inches and is made from a Moorman's ShowTec swine feed sack. It is made of a waterproof material similar to a tarp but lighter weight.
My sack already had the string and paper closure removed on the top. I cut the sack bottom off with craft scissors then I took the bag to the bathtub and gave the sack a bath with warm water and liquid dishwashing detergent. Hang to dry.
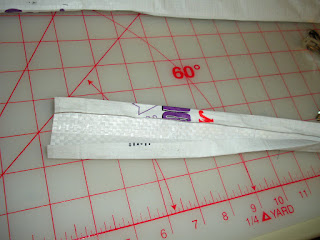
After the sack is dry I used my rotary cutter and ruler to straighten the bottom. Then I measured three inches and made another cut. Repeat. These will be the straps.
I cut these open with my craft scissors. Then I measured and cut them 24 inches.
Then I finger pressed about 3/8" under on both long ends of each strap (do not use an iron-it will melt). Then fold in half. I used my binding clips and it worked great. Paper clips or paper holders would work. Take it to the sewing machine. I have already inserted a size 16 needle or you could use a jean (denim) needle. I set my stitch length to a large stitch. I topstitched both straps beginning with the folded edges first. Then I turned and topstitched the other side on both straps. Your straps are ready to be sewn in the tote.

I smoothed the sack out aligning the crease lines front and back. Then I sewed the bottom of the tote right sides out using a 1/4" seam. You will be sewing another seam on the bottom shortly and that will create a french seam.
My sack had a line where the string had perforated the top. I folded the top down on that line and then folded it again 1". I used my binding clips again to hold it in place. I measured from the fold lines of the front of the sack--15 inches and decided I would space my straps 5 inches from the side. I slipped each end inside the folded area. I pulled the straps out and then topstitched and backstitched.
I turned the bag wrong side out. Then I smoothed it out. Then I sewed the bottom seam with a 1/2"to 5/8" seam. When the tote is turned out this will make the French seam. Now it is time to box the corners. With the top of the tote on my cutting table and the bottom of the tote facing me I finger pressed the seam I just sewed in one direction. Then I folded it like this.
Then I flipped it to the other side and using the crease lines in the original sack I measured from the point to the crease line on each side. I marked it at four inches and drew a line.
I sewed on the line making sure the seam stayed turned the same direction on the back side. I did the same to the other corner to box it. Then I cut off the corner leaving a good sized seam allowance. I then turned the seam allowance under and stitched it down turning it toward the side of the tote. Repeat to the other corner. The tote is finished. Turn it right side out smoothing and straightening.
The smaller tote is the first one I made. I have a Pedigree dog food sack to make another. These will make nice grocery bags. They will come in real handy when we shop at Sam's Club.
Let me know if you have questions or if anything isn't clear.
Blessings,


How innovative...recyle is a good thing...Nice!!!
ReplyDeleteMarilyn, what an incredible idea to recycle those old feed sacks! Your creativity is great and the finished product looks terrific! Thanks for sharing your instructions and good luck using these nifty bags at Sam’s Club soon! – Ramona from Sam’s Club
ReplyDelete